
Another Weller soldering station
This project differs from the published ones on 3 points : - Two temperature memories instead of one, - A simple standby mechanism to spare the tip in a transparent way for the user, - a cheap PIC MCU.
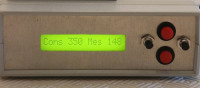
As recalled throughout all the magazines, Elektor has the ambition to provide its readers with bases on which they can develop a montage. As far as I am concerned, the soldering stations described in [2, 3, 4], which I have been thinking about since the article on SMD welding [1], has seen its specifications evolve according to my aspirations. These focused on three points:- add at least a second temperature memory, to distinguish, for example, the soldering temperature from a lead-free solder to a lead one;- detect the placement of the iron on its support to reduce its temperature to 150 ° C. The very rapid rise in temperature (3s according to the Weller documentation), makes this action completely transparent for the user. Furthermore, this detection starts the 20-minute timer leading to a deep standby at 50 ° C and wake up from standby when removing the iron from its support;(image 1)- for the sake of art, use a microcontroller with just the needed number of pins. On this last point, as a user of the PIC series, I have chosen the PIC 12F1840 which, with its 6 useful outputs, meets the need. But the choice of controller is almost anecdotal, the transition from one family to another requiring little more than adapting the initialization part of a program written in C. For instance, my program is a nearby version of the original Atmel version [2]. To save pins, the LCD display is driven in I2C. For the hardware part I kept the initial amplification circuit [2].I did not understand the need of the current measurement part of the January 2019 version (3), I did not keep it. As a matter of fact, Elektor suppressed it from its third version [4]For the PWM output, I didn't quite grasp the need to take the push-pull stage either [3], and I also kept the original edit. But it's easy to change. I added, on a commercial iron support, a limit switch, which, by means of a small lever arm, closes when the iron is present on its support.(image 2)
Finally, the keys are read via the ADC, the keys being connected to a four-level voltage divider. The power supply is entrusted to a commercial switching unit, which offers a setting between 12 and 24 volts. A 5 Volt USB output is available, but it is too noisy for the needs of the temperature measuring amplifier. Incidentally, the voltage adjustment rends this electronic compatible with other soldering tips, as described in [4].(image 3)
Finally, the most complicated point, the production of the iron, is provided by a 6.35 mm jack connection and a 6.35 to 3.5 adapter. In terms of advantages, this allows:- to use a large diameter connecting cable, to the benefit of the section of the wires which compose it,- an unbeatable production complexity / performance ratio.On the other hand, I find the iron a bit light in the hand.(image 4)
Possible improvements:
- Replace the temperature adjustment keys with an rotary encoder. While the auto-repeat keys work fine, this interface is not the most standard. This adaptation should not pose any difficulty;
- Replace the iron switch in position with a motion sensor. Small modules are available on the net. Stillness is easily detected by software. After studying this very elegant solution, I gave it up because it complicates the production of the iron itself. A suitable handle must be able to be produced in 3D printing, but I do not have such a tool.
- According to [4] the Weller soldering station is sensible to the slight drop in temperature when, for instance, sweeping the soldering tip on a sponge. This should allow a wake up from standby. When I check this movement, I can see a 1 to 2°C drop, a rather low evolution. Maybe that the derivation with respect to time would lead to a more significant signal.ConclusionThe very simple scheme and its PCB are given here (image 5)(image 6) The software is written in C and was developed on Microchip MBLAB IDE X V5.35.
Bibliography
[1] Elektor May - June 2017
[2] Elektor July - August 2015
[3] Elektor January - February 2019
[4] Elektor May - June 2021
Discussie (1 opmerking(en))