
Make programming the ATtiny DIP8 easier with “EasyTinyProg”
When creating projects with an ATtiny DIP8, it is often necessary to program the microcontroller several times, especially if adjustments to the code are necessary. This involves removing the ATtiny from the prototype circuit, connecting it to the programmer, uploading the code, and then reinstalling it on the circuit. This back and forth can quickly become tedious, particularly when the microcontroller is used in configurations that require specific connections.
Mounting
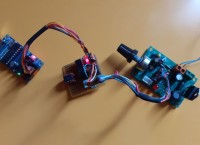
I used a CD4053, an analog/digital multiplexer, to create the device. The target ATtiny DIP8 is connected to the CD4053, as well as the programmer and the prototype circuit.The Switch
A toggle switch (double changeover) controls the CD4053.In the “Project” position, the CD4053 directs the ATtiny pins to the prototype circuit.In the “Programming” position, it connects the ATtiny to the programmer.The power supply of the target ATtiny switches from the project to the programmer used. The CPU is powered by the ISP in programming mode, i.e. 5V. In project mode, the power supply comes from it (this could be a 3V3 project for example)Ease of use
To program the ATtiny, simply flip the switch to the “Programming” position.A red LED lights up to indicate that the device is in programming mode.Once programming is complete, return the switch to the “Project” position, which reestablishes the connection to the prototype circuit.Benefits
Eliminates the need to physically remove and reinstall the ATtiny when programming.Avoid connection errors by simplifying the process. Saves time and effort, which is especially useful when iterating code.-- FR
Le Montage
J'ai utilisé un CD4053, un multiplexeur analogique/digital, pour créer le dispositif. L'ATtiny DIP8 cible est connecté au CD4053, ainsi qu'au programmateur et au circuit prototype.Le Commutateur
Un interrupteur (double inverseur) à bascule contrôle le CD4053.En position "Projet", le CD4053 dirige les broches de l'ATtiny vers le circuit prototype. En position "Programmation", il connecte l'ATtiny au programmateur.L'alimentation de l'ATtiny cible bascule du projet au programmateur utilisé. L'UC est alimentée par l'ISP en mode programmation soit 5V. En mode projet, l'alimentation est issue de celui-ci (cela pourrait un projet en 3V3 par exemple)
Simplicité d'Utilisation
Pour programmer l'ATtiny, basculer simplement l'interrupteur en position "Programmation". Une LED rouge s'allume pour indiquer que le dispositif est en mode programmation. Une fois la programmation terminée, remettre l'interrupteur en position "Projet", ce qui rétablit la connexion au circuit prototype.Avantages
Élimine la nécessité de retirer et réinstaller physiquement l'ATtiny lors de la programmation.Évite les erreurs de branchement en simplifiant le processus. Économise du temps et de l'effort, ce qui est particulièrement utile lors de l'itération du code.Want to build a project?
Bring your design to life with the Elektor PCB Service, powered by Eurocircuits. Upload the project files and order professionally manufactured PCBs or assembled boards through a proven European production platform.
Supporting KiCad, Eagle, Gerber, and ODB++ formats, the service is suitable for everything from prototypes and validation builds to series production and volume manufacturing.
Made in Europe. Fast. Reliable. Professional.
Updates van de auteur