
MakePython ESP32 Development Kit - Alles in een doosje
op
We gaan verder in het Engels:
Modern microcontrollers, such as an ESP32, are so powerful that they can be programmed in MicroPython – thanks to the powerful libraries, this allows you to quickly achieve a finished project. With the MakePython ESP32 Development Kit – which is a textbook on the one hand and a hardware kit on the other hand – well-known Elektor author Dogan Ibrahim now presents a starter package that illustrates how to work with MicroPython by means of real-world examples.
We don’t really need to discuss the fact that MicroPython is not the way to maximum software efficiency. On the other hand, it is true that modern microcontrollers like an ESP32 are more than able to keep up with a 486 in terms of performance – especially in small series, it can therefore be reasonable to trade off programming effort for speed by using high-level languages.
The book
Let’s start with the textbook, which is available in English: It comes with a quite fancy design, which pretends a (fake) spiral binding.
The actual didactic structure then begins with a brief explanation of the ESP32 as a whole: As an Elektor reader who already has extensive or at least basic experience with microcontrollers, it will provide you with a “quick” overview of the various peripherals provided by Espressif in the controller. If you have no experience at all with microcontrollers, the explanations – at least in places – might be too short for solid understanding.
The installation of the IDEs – Ibrahim introduces both uPyCraft and Thonny, but later works almost exclusively with Thonny – is explained in detail for Windows, whereas Linux is hardly covered. This is followed by a chapter that illustrates the execution of some “small” Python snippets using Thonny – if you don’t have any knowledge of Python syntax, you can’t really get into it at this point. On the other hand, the explanations are more than sufficient to understand the “basics” of working with MicroPython and the IDE.
The actual presentation of the 46 projects contained in the book is then done in the classic Dogan Ibrahim style: In the first step, the professor always presents the “battle task to be completed”, and then presents code and explanations of the hardware construction. Fans of compact coding in particular might be somewhat annoyed by the fact that the listings always include a standardized header with a good ten lines. On the other hand, to Ibrahim’s credit, the examples – while not complicated – do aptly illustrate the essential aspects of working with MicroPython.
After reading this, you will certainly no longer have to fear the desperate search for how to put certain peripherals into operation. Very commendable, in the reviewer’s opinion, is the fact that Ibrahim explains how to equip a “messed up” board with new MicroPython firmware.
A look at the board
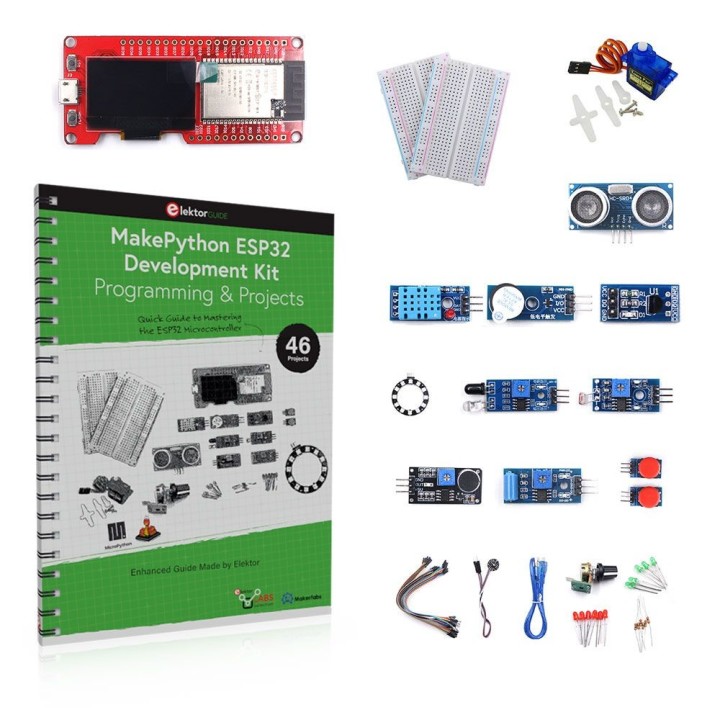
Speaking of the evaluation board: The textbook is available in combination with the kit shown in Fig. 1, which is also suitable to take along on vacation or to prevent boredom on a business trip due to its quite robust plastic packaging.
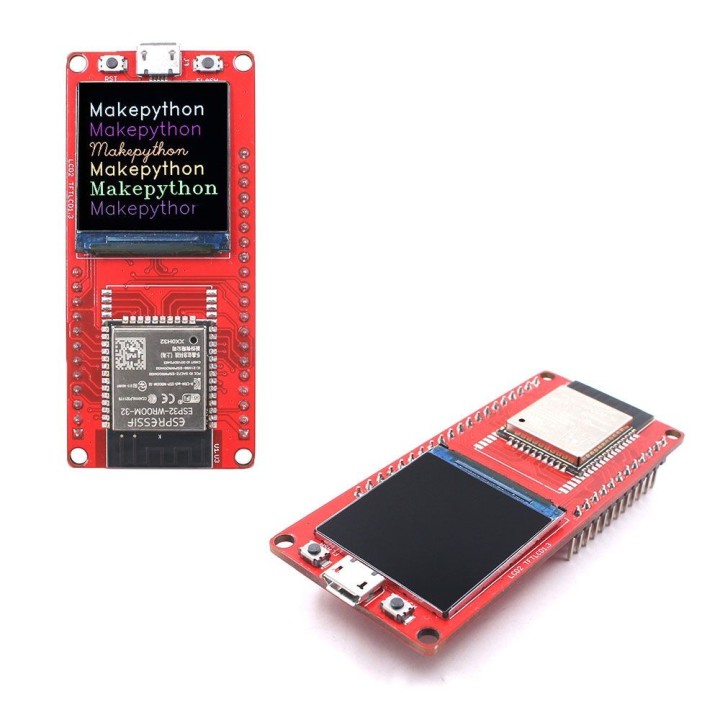
But let’s take a look at the actual hardware now: The author’s practical teaching experience has shown that especially developers not familiar with embedded systems will have a more comfortable learning experience if the development platform provides an (ideally fully graphical) display.
Elektor cleverly gets around this problem by providing the red PCB shown in Fig. 2 – the black area is not a black hole, but one of the widely used SSD1306 OLEDs with a resolution of 128 by 64 pixels.
The reviewer’s biggest point of criticism is hidden here: The 2.54 mm headers are not soldered in. This is a pity because a person who buys the kit directly in a store and takes it with them on vacation is screwed at this point – at least if you don’t have a soldering iron at hand for its installation and the cell phone store next door doesn’t help.
Otherwise, the board offers no reason for criticism: The ESP32 variant used is one of the larger models and has enough memory, the MicroUSB interface ensures that “command device cables” can be borrowed quickly from any older cell phone. In addition, the kit also includes a (very short) cable of decent quality.
A demo
While the textbook is primarily oriented towards the needs of developers working with Windows, the reviewer will refer to Ubuntu 20.04 LTS in the following steps – if only for the sake of convenience. The IDE available at uPyCraft is a rather bad choice because its execution in all Ubuntu versions later than 16.04 fails with an error message like:
A “nicer” option is Thonny, which can be installed automatically by entering:
And can then be started by entering the command:
To uninstall, we use the command:
All that remains to be done after the first start is confirming the language selection.
The next step is to connect the evaluation board to a workstation. Fortunately, Elektor thoughtfully delivers the board with a preconfigured MicroPython runtime. In this context, it is especially convenient that the board also switches on the display at the same time, which facilitates a function check. By the way, a Silicon Labs CP210x UART bridge chip is used as converter.
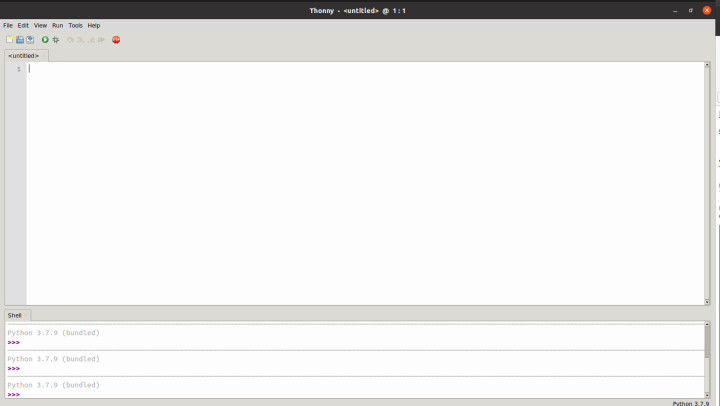
At this point, you can switch to Thonny (Fig. 3). Make sure that you click on the Python version in the selection menu that appears at the bottom right and then select the MicroPython (ESP32) version. Thonny will then automatically search for ESP32 boards – in this case, the board used here was automatically detected.
The question of whether you need to run Thonny with superuser privileges is debatable – since the reviewer’s user account is a member of the plugdev group, he was able to run Thonny in his normal user account and still interact with the ESP32.
A first welcome
As the next action, let’s move on to putting the device’s OLED display into operation. To do this, we open the URL and download the archive MakePython ESP32 Lessons Source Code – using RAR is a bit annoying in Linux.
EIn any case, extract the archive to a conveniently accessible location. For the following steps, we especially need the file ssd1306.py, which provides the OLED driver code.
In the first step, click File -> Open, and then choose the This Computer option. In the next step, navigate to the file to load it into the editor.
Then we choose File -> Save as and then the option MicroPython Board.
If Thonny gets upset at this point about the backend being “busy”, you can click on the red stop icon in the toolbar to command a halt. In the next step, you save the file into the file system under the known name – at least if you did not leave the original firmware unchanged. In this case, the file is already in place.
As is common with MicroPython, we first need to install some libraries and also define constants with additional information about the specifications of the display:
import ssd1306
import time
WIDTH = const(128)
HEIGHT = const(64)
For the actual communication with the display connected via I2C – which is uncommon, as you would usually expect SPI here – we then use an instance of the software I2C class:
psda = machine.Pin(4, machine.Pin.OUT)
i2c = machine.I2C(scl=pscl, sda=psda)
oled = ssd1306.SSD1306_I2C(WIDTH, HEIGHT, i2c)
Finally, we need to send a text to the display according to the following scheme:
oled.fill(0)
oled.text('Hello World!',10,0)
oled.show()
time.sleep(1)
At this point you can click on the play icon in the IDE to enjoy the text appearing on the display of the evaluation board.
MQTT setup
As a next task, we want to go a little beyond the “ordinary” project scope included in the kit and realize an advanced task – this also shows that the kit is suitable for higher tasks. Specifically, we want to use the universally known MQTT protocol. The task becomes especially interesting by the fact that we want to work with a brand-new version of the MQTT broker Mosquitto – at the URL, you can find a (recommendable) description of the issues that the parsers – which are configured more and more strictly for security reasons – can run into in interaction with the MicroPython drivers.
Speaking of MicroPython drivers: Meanwhile, there are two competing implementations of MQTT for MicroPython. However, here we want to rely on the simpler variant available at GitHub - download the file and save it under the name simple.py on the process computer.
In the next step, we need to set the Wi-Fi transmitters of the board into station mode according to the following scheme:
wlan=network.WLAN(network.STA_IF)
For the actual connection setup, we then use a method built according to the following scheme – it is largely taken from the project skeleton provided by MakerFabs and implements a countdown timer including connection establishment. Of course, make sure to adapt the strings passed to wlan.connect to your wireless network situation:
i=0
wlan.active(True)
wlan.disconnect()
wlan.connect("ssid","pass")
while(wlan.ifconfig()[0]=='0.0.0.0'):
i=i+1
oled.fill(0)
oled.text('connecting WiFi',0,16)
oled.text('Countdown:'+str(20-i)+'s',0,48)
oled.show()
time.sleep(1)
if(i>20):
break
oled.fill(0)
oled.text('Makerfabs',25,0)
oled.text('MakePython ESP32',0,32)
if(i<20):
oled.text('WIFI connected',0,16)
else:
oled.text('NOT connected!',0,16)
oled.show()
time.sleep(3)
return True
Establishing the actual test connection then couldn’t be easier:
while True:
time.sleep(1)
In the next step, we want to provide ourselves with a Mosquitto server: While Mosquitto is not the fastest MQTT broker, it is open source, free and very strict in its MQTT implementation.
Due to its widespread use, it is also ensured that there is a more or less turnkey image in the Docker Hub that allows the deployment of the server without deep configurations of the host computer.
For a first attempt, it is sufficient to enter the following command:
Firstly, the parameters -p 1883:1883 and -p 9001:9001 - are important here – after all, each Docker container is provided with a full complement of TCP/IP ports by the runtime. Each of the parameters then connects one of these ports to the host computer’s network card. Via the parameter -v mosquitto.conf:/mosquitto/config/mosquitto.conf, we also integrate a configuration file.
At this point, it is a good idea to make an initial download attempt with an existing Internet connection. Docker will normally connect to the hub and download the required components, and then exit with the following error message:
The cause of the error is that there is not yet a file named mosquitto.conf in the host workstation that we could make available to the container.
To solve the problem, it is sufficient to create a new file via the command line in the working directory with gedit:
The switch from Mosquitto version 1 to version 2 was accompanied by massive tightening in the area of security configuration. While a Mosquitto 1.X (started with default parameters) accepted server requests from any clients, Mosquitto 2 refuses this. However, if you place the following lines in the configuration file, everything will work as usual (and insecure) again:
allow_anonymous true
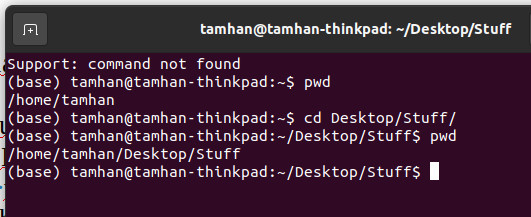
The actual execution can then be commanded according to the following scheme – note that the -v parameter always requires a fully qualified path, which is why we call the pwd command and “assemble” the results by shell magic. pwd, by the way, stands for Print Working Directory, Fig. 4 shows the behavior:
. . .
If the Docker container acknowledges its successful start by returning 1658673183: mosquitto version 2.0.14 running, we are all set at this point.
Initializing the MQTT software on the ESP32
First of all, we need some constants for working with MQTT – make sure to adapt the IP address passed in the server string to your local operating situation:
CLIENT_ID = ubinascii.hexlify(machine.unique_id())
TOPIC = b"led"
state = 0
We also need a callback function that the MQTT driver will always call when a message is received:
global state
print((topic, msg))
. . .
The actual setup of the MQTT connection is then comparatively simple:
c = MQTTClient(CLIENT_ID, SERVER, keepalive=30)
c.set_callback(sub_cb)
c.connect()
c.subscribe(TOPIC)
print("Connected to %s, subscribed to %s topic" % (SERVER, TOPIC))
while True:
c.wait_msg()
The call of c.subscribe ensures that the MQTT driver informs the server which message channels are currently of interest. It is also important to periodically call the method c.wait_msg() to provide the MQTT server with processing power for processing the information that is incoming or to be sent. In the command line or in the output window, you can then see the output Connected to 192.168.178.146, subscribed to b'led' topic.
In the next step, we want to connect one of the included LEDs, along with the included resistor, to the GPIO pin 12 – the author assumes that the reader has sufficient knowledge of electronics. The initialization of the GPIO port then only requires ordinary ESP32 code:
To process the incoming messages, we then need to extend the callback by combining the string supplied in the value topic with the constants provided for the various commands:
global state
print((topic, msg))
if msg == b"on":
led.value(1)
state = 1
elif msg == b"off":
led.value(0)
state = 0
elif msg == b"toggle":
led.value(state)
For the actual testing, we want to use the command line utility mosquitto_pub: This is a tool available in Linux that allows commands to be sent directly to an MQTT server. The following commands are then used to switch the LED on and off:
(base) tamhan@tamhan-thinkpad:~$ mosquitto_pub -t led -m 'off'
If the ESP 32 and the server are in the same network, you can now switch the LED on and off.
Conclusion and outlook
The MakePython ESP32 Development Kit is a fascinatingly compact toolbox that allows Python developers and/or electronics engineers to quickly unite the two worlds. Especially because everything is so nicely packaged in a turnkey manner, this is a box the reviewer is happy to recommend.

Discussie (0 opmerking(en))